Color Mixing: Explore Science
Finger painting and mixing stuff together is a favorite of little ones everywhere. Mixing colors together to create new colors is the perfect way to experiment your preschool, kindergarten, or special needs students while practice color words, site words, and science.

Let’s Get Ready!
This activity has little prep, lots of rewards, and much faster cleanup with a few little tips (see below). First have your printed pages ready to go. Make sure you have one page per student for each color mixing activity you would like to do. I do like to create books out of these after they dry. Trying to create these before drying will leave you with a mess! Have the primary colors red, yellow, and blue along with black and white if you wanted to mix up a few extras like grey and pink. Decide what you want to paint with: paint brushes, Q-tips, sponges, fingers, etc. Discuss primary and secondary vocabulary with your students. If your students go to art class talk to the art teacher to see if they can align their art lessons with your classroom lesson.
Pass out the mixing pages for the colors you have decided to explore along with any painting mediums. Give each student either a lid of paint or squirt a small amount onto each students’ paper. Then let them mix and explore. Once they discovered what color has been created, they can write it with a crayon or they can paint the word on the lines also.
Easy Clean Up Tips

I admit that there have been times I’ve not gotten out paint and other beloved messes because I don’t want to spend the extra time on clean up. Let’s minimize that mess with a few easy strategies!
Have baby wipes or a small tub of water on each table. This keeps little ones hands clean and ready other colors or word writing.
Cover your tables with Press ‘N Seal from Glad. Once you’re done you can pull the cling wrap off and toss it right into the trash. Perfectly clean tables every time!
Ready to be more earth friendly? Instead of one-time-use plastic you can use plastic tablecloths that are backed with flannel. They look really nice, make for a solid surface to work on, and (are you ready for it?) can go right into the wash machine to be cleaned. The same thing can be done with plastic shower curtains. Praise the washing machine!
Another cleanup option is having trays for each students work area. You can often borrow/steal these flat trays from the cafeteria or you can use the lids of Rubbermaid storage containers. These are easy to clean and if you use the trays you can forgo any little containers for the paint to go into which reduces additional clean up.
Special Needs Accommodations
So what about our students with special needs? Especially our friends with autism who don’t want ANY paint to touch them or get on them. Using latex gloves or the cafeteria style looser gloves are great for these kiddos. My cafeteria staff happily donate a box gloves to my students.
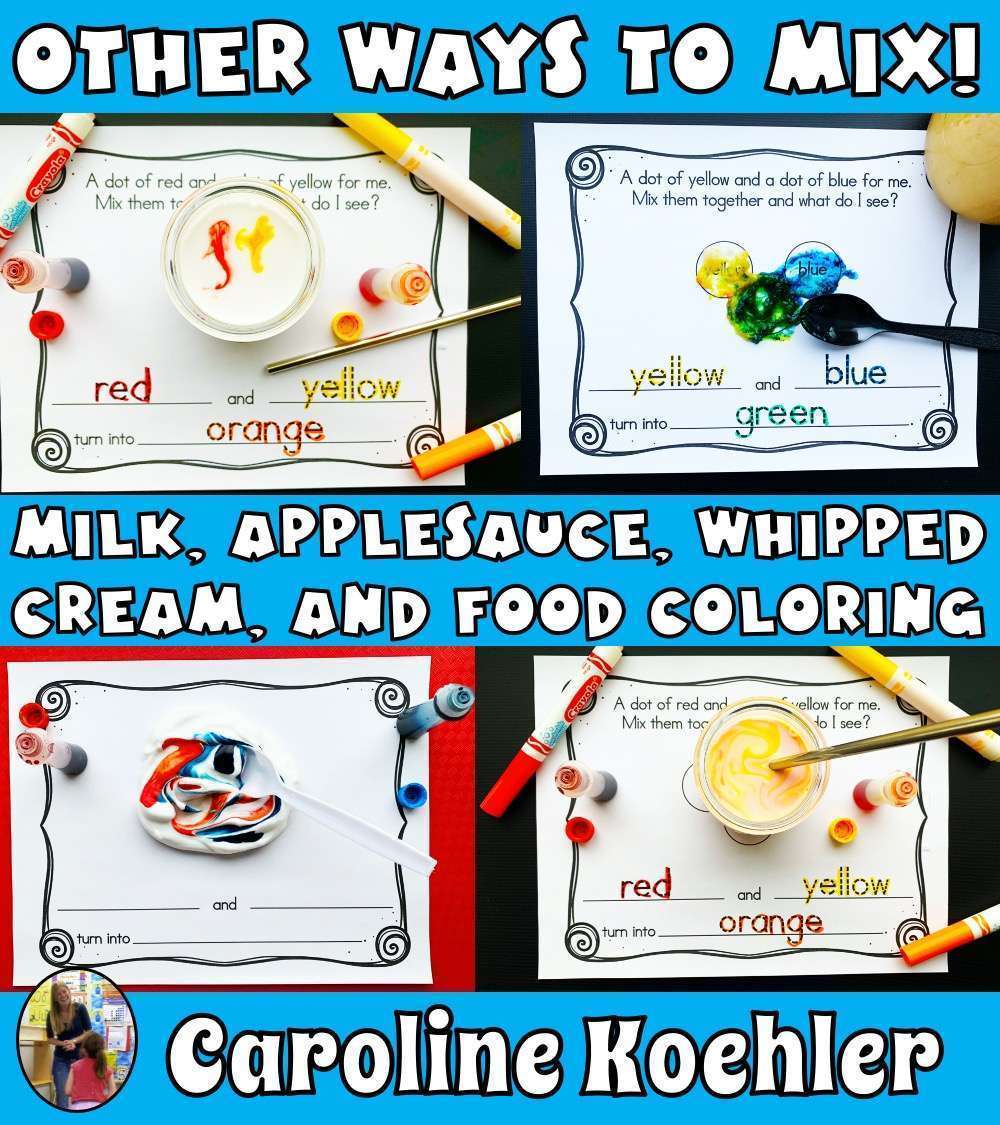
Or maybe you have a student with special needs who has some intense oral sensory needs meaning they put everything into their mouth. While the paint is non-toxic that you buy these days, it’s really not a great idea to have your students eating paint. Instead let’s do color mixing experiments with applesauce and food coloring. It’s healthy, it’s fun, and it still gives the students the same experience of mixing together colors. You can do the same activity with white icing instead but it’s definitely not nearly as healthy. Whipped cream works beautifully for this also.
Want to drink your science experiment instead of eat it? Grab one of the white milk containers at your school, pour the milk into a clear container, add a few drops of food coloring from the primary colors you want to mix, and stir it with a spoon or straw (see pictures below). The students can see the science transform and have a healthy, colorful drink at the end. What’s that? Sure, you can use plain old regular water also! While it’s not as dramatic to watch it still fun and it’s still science.
Keep Mixing Colors Going ALL YEAR LONG!
Think this activity is a one time lesson? Think again! Pull this activity out at a holiday time and practice when you’re making Valentine’s. Use your newly mixed paints to create beautiful reds, pinks, whites, and purples. Remember that unhealthy but edible color mixing for food we talked about? Let’s mix up some new icing colors and ice some green St. Patrick’s Day cookies.

Budget Friendly Ideas
Don’t have beautiful tempura paint? No problem. This activity can be done with water colors which are much cheaper. You can create your own watercolor paint with food coloring. The set of food colors I have was bought over 10 years ago and is still going strong. A bottle of white shaving cream and a few drops of food color goes a long way for this activity too.
AND this is so much fun to do after your group has completed Sink and Float and the Color Mixing Activity. You can combine both of these activities and boom: a whole new, fun-filled science activity.
Get your ready-to-print
Mixing Colors Printables